Wedding Invitation Suite Ideas - Floral Watercolor, Clear Invites & Wax Seals

There were many elements that I wanted to incorporate into my invitation suite, and it was difficult to hone in on exactly how to execute it. At the end of the day, I did - like many other brides, want to stay cost efficient so that I wasn’t spending all this money on paper goods that would end up being discarded. What helped me make decisions on selecting the invite suite was being able to receive custom samples and envelope and liner samples so I could visually see how everything worked or did not work together. All costs contributing to designing, creating and mailing my invitations summed up to about $365.00 ($6/invite)- samples, actual invites (including extras), and postage for the invites I did mail. What’s really interesting is from 14,000+ people surveyed by The Knot for 2018 (this is the year we ordered and mailed our invites as well) is $386 for money spent on invites, so I’m pretty proud that I was able to spend below the average. Of course, there are many factors that attribute to the overall costs of your invites such as: paper and print type of your invite suite, additional cards or prints to accompany your invite, any hand written or hand painted work you have done, how many guests you have to print and mail to, and any other design elements you may include in your suite such as textiles, artwork, etc. Below, I share my process in completing and mailing out my wedding invitations.
Ordering Wedding Invite Suite Samples
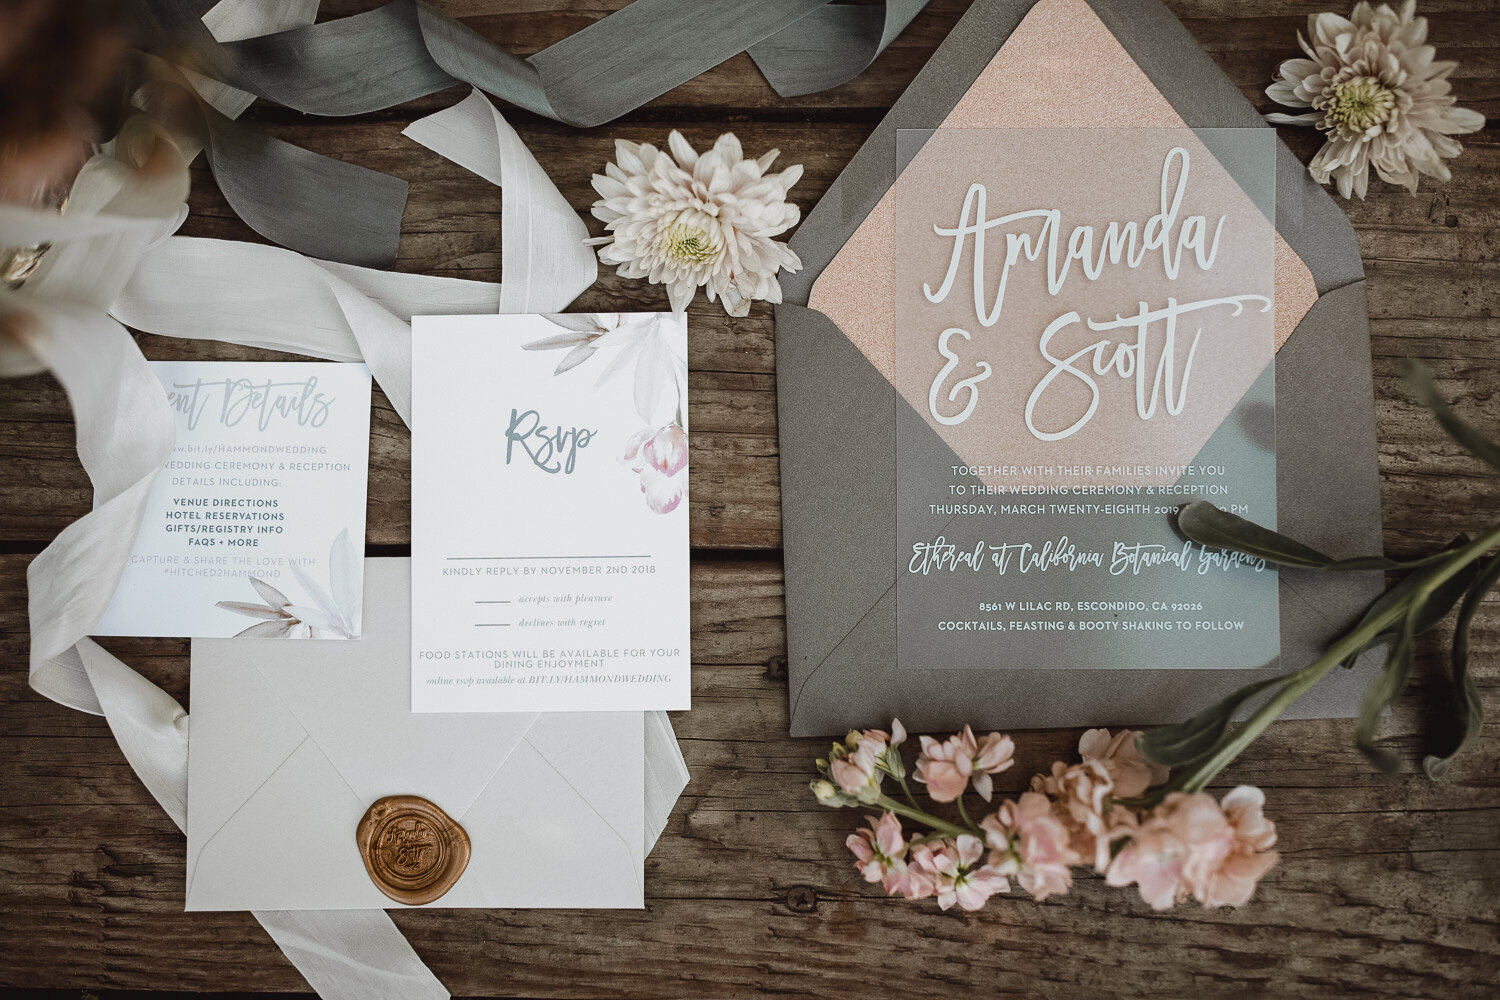
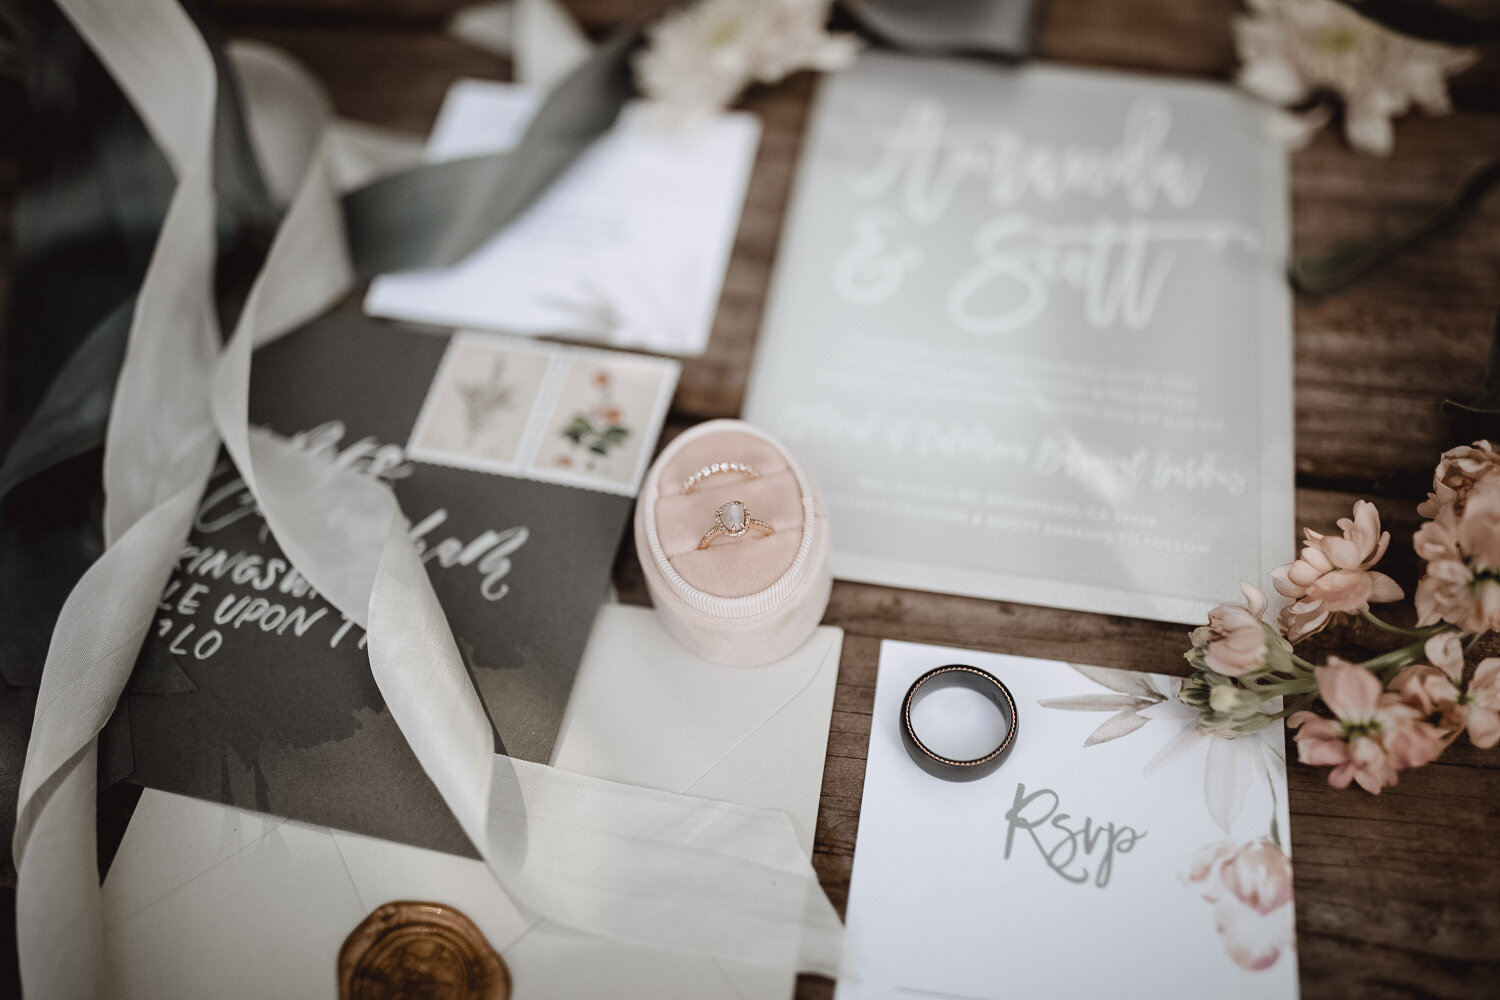
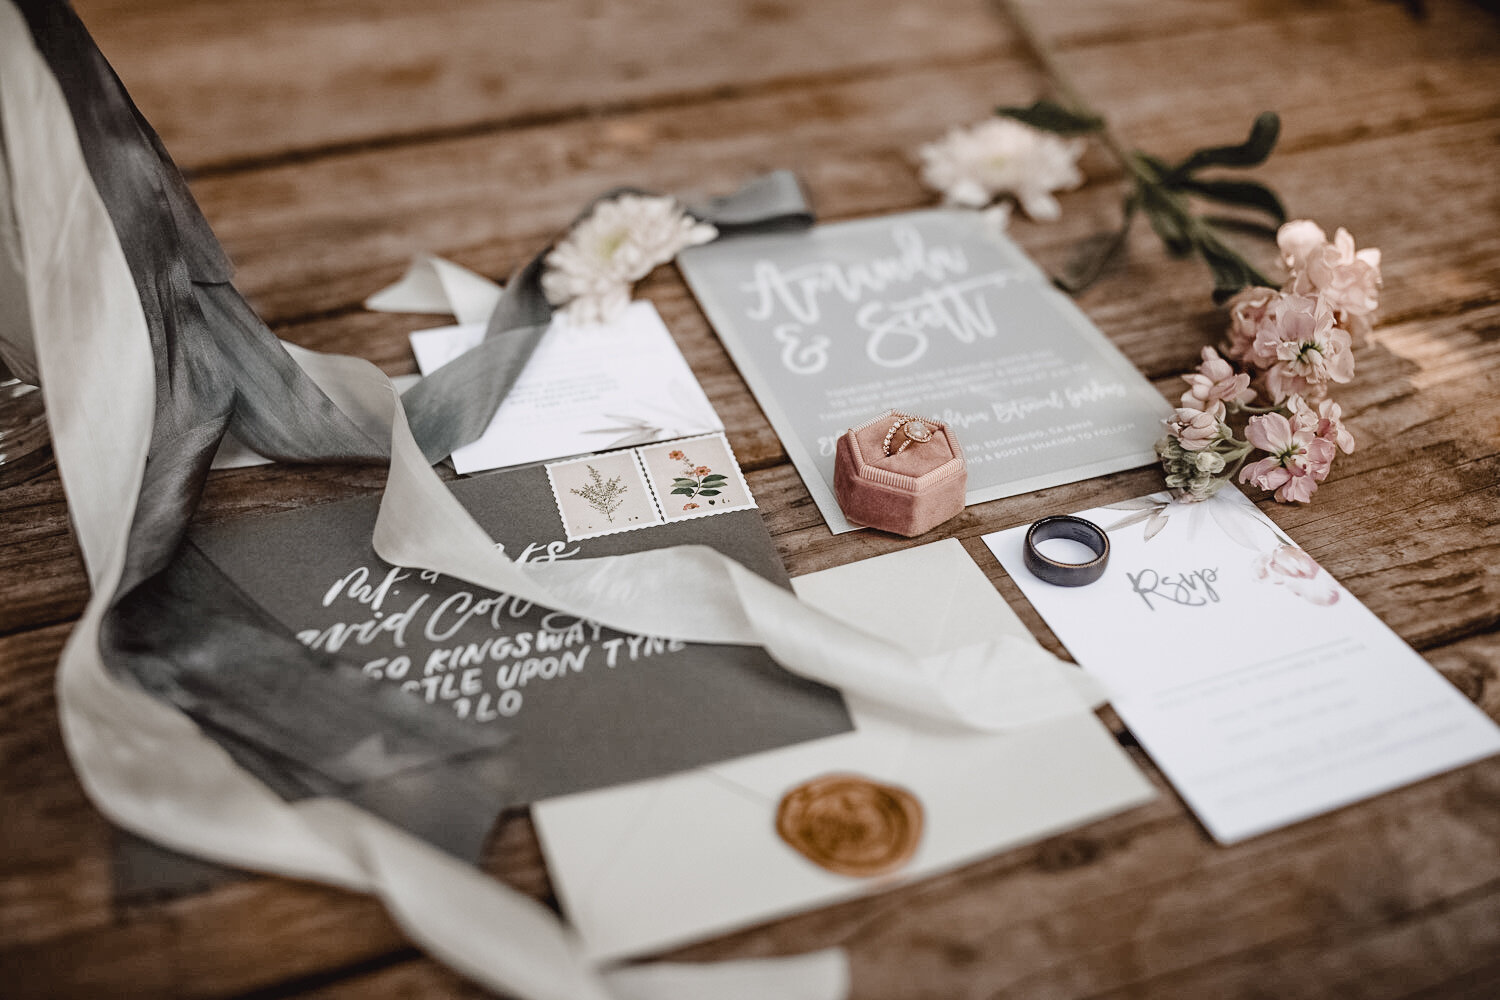
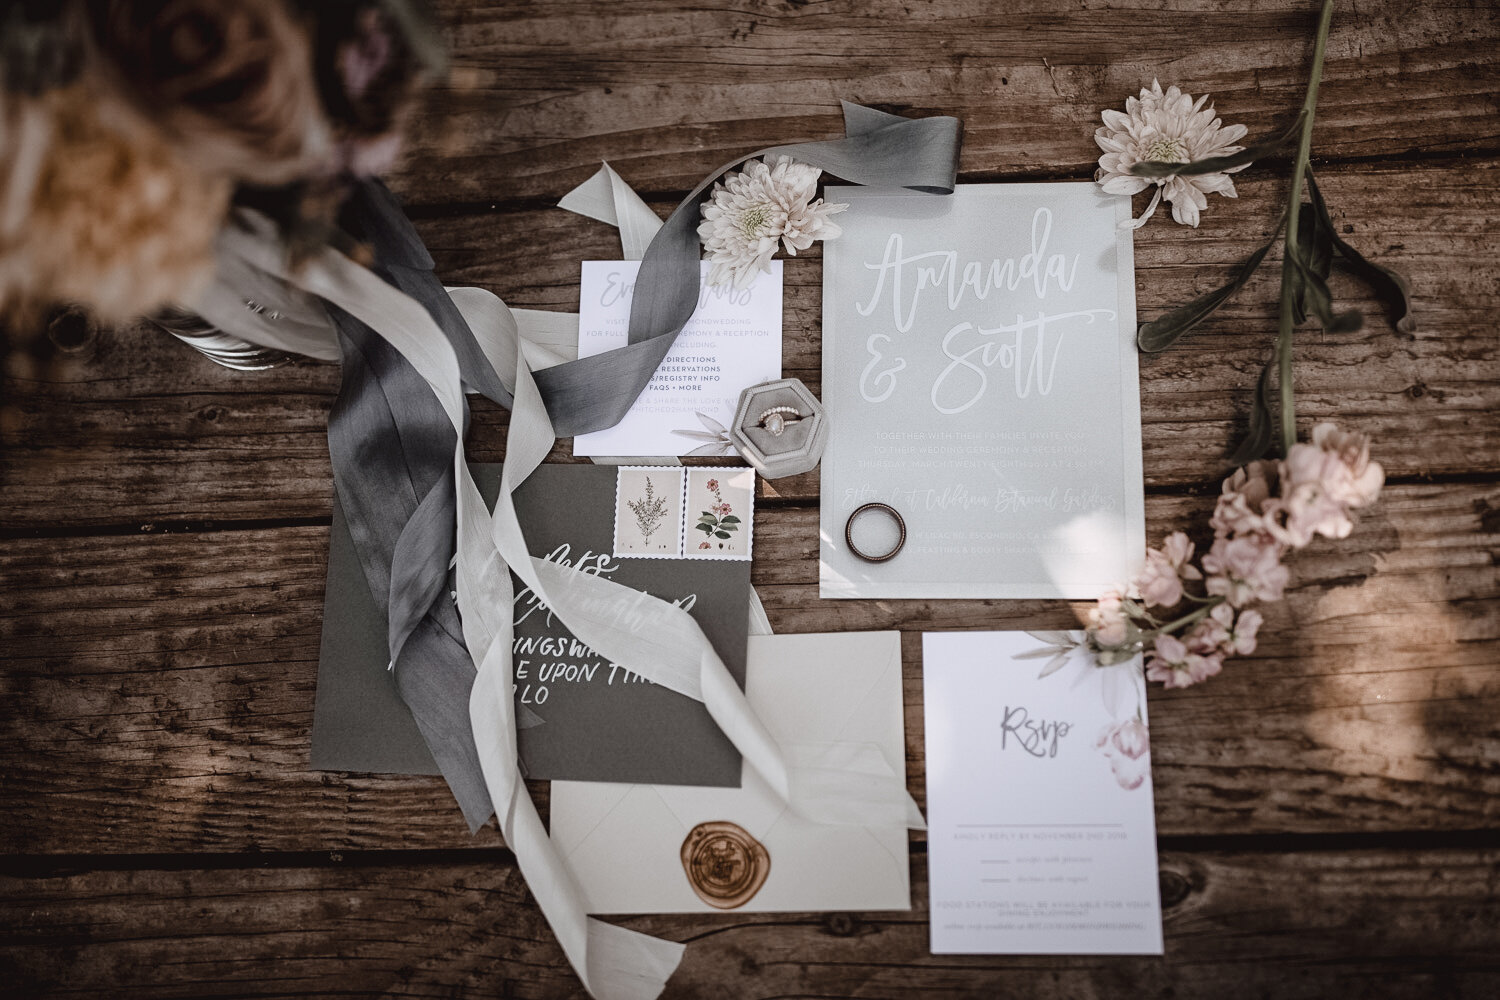
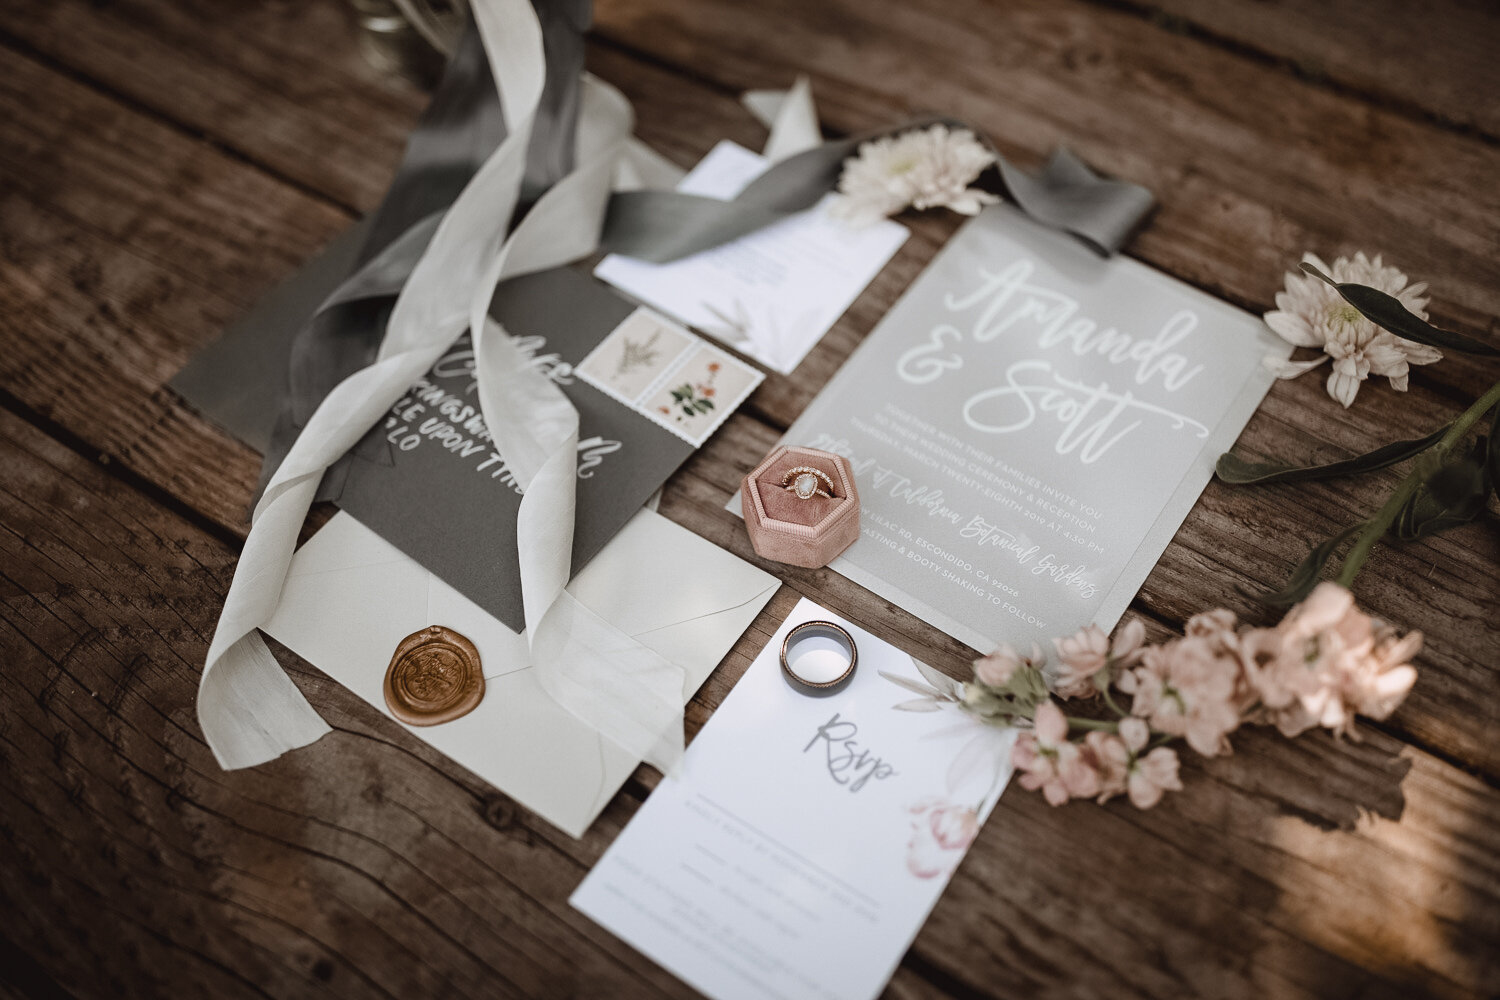
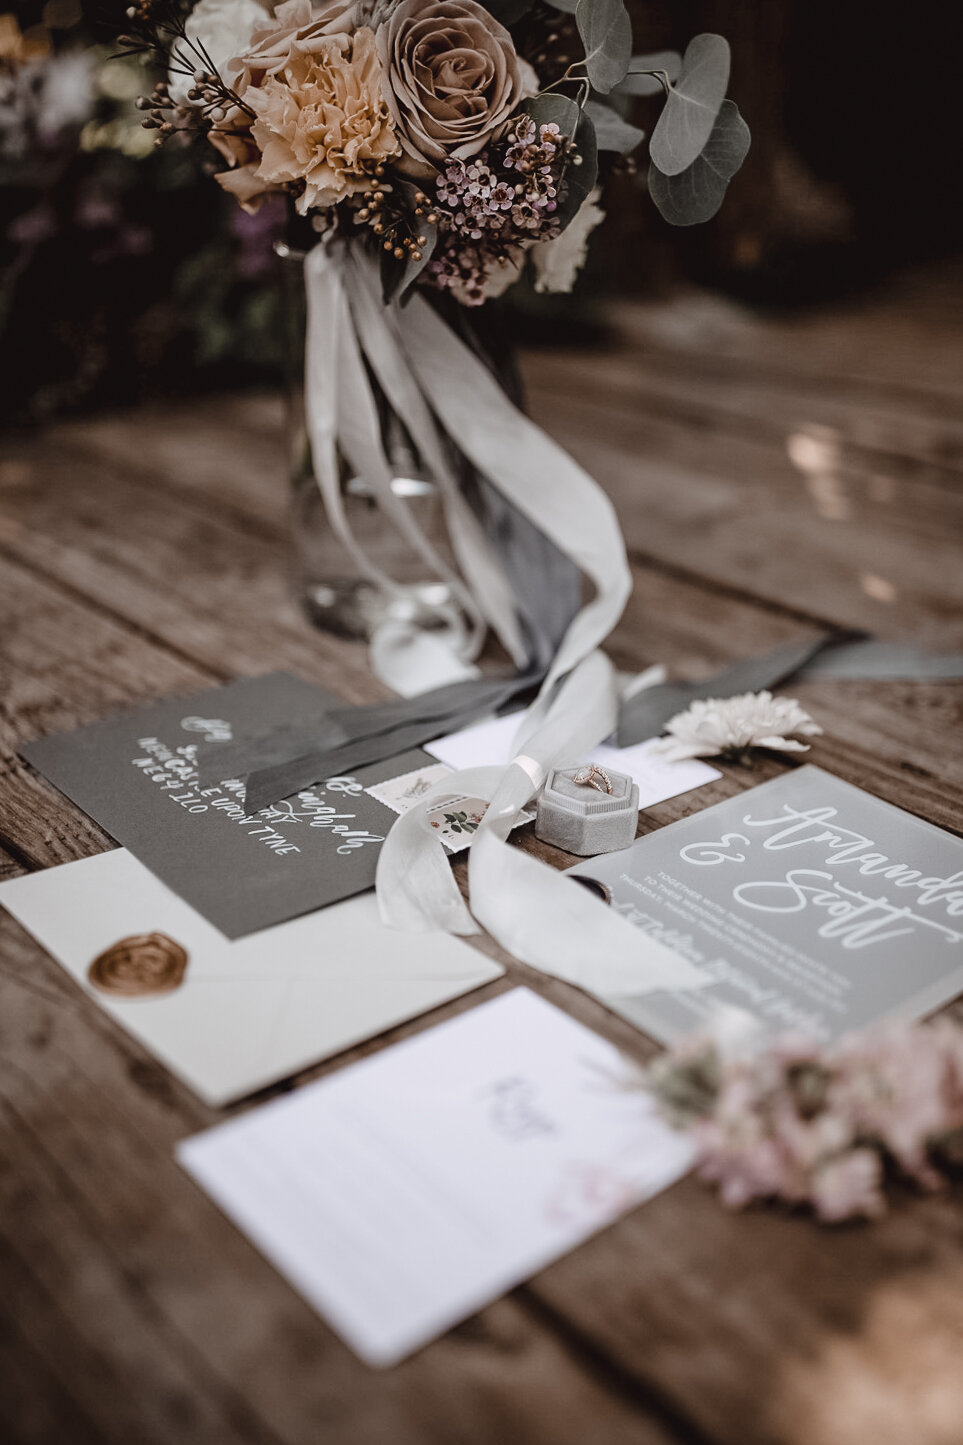
I made the decision to get a few custom sample prints from Basic Invite, and use those samples to shoot our invitation suite. The sample set included an Event Details & RSVP card in a floral watercolor design, then I had several clear invites made (with different wording, fonts and transparent and frosted versions) using the Marker Script template. Basic Invite includes square peel & stick addressed white envelopes which cuts out having to hand write/address envelopes (you have the option to upgrade your envelope color should you want to see what other colors look like in person, you just cannot have an address printed onto the envelope if it is a sample order).
Because I wanted euro flap envelopes for the invitation suite photos, I ordered 20 sample envelopes of varying sizes and colors for $11 that would coordinate with my sample invites and detail & RSVP cards. I’m glad that I ordered an assortment, because you really don’t know how colors will look until you have them in person. I also ordered a few envelope liners. And I got a better idea of how I wanted to pair varying color envelopes with the sample invitation suite. Colors really do make a big difference with the overall feel and tone of the suite when you put it all together.
Ordering Wedding Invitations
Overall, I spent $38 on various samples, and $282 for 75 clear invites + addressed envelopes ($3.76/invite). I’ve partnered with Basic Invite before, and I really love the variety of designs and templates they have to fit all styles of brides and weddings, and the ease of use in customizing as well as being able to receive an actual custom sample is what made it for me and moving forward with ordering from their site. There are a handful of other sites that offer great designs and you can order a sample, but not necessarily be able to order a custom sample - so you don’t actually get an accurate idea of how your invite or invite quite will look like to the T. I don’t have photos of the actual invitations sent to guests, but I also had cut vellum paper so that it would fold around the clear invite, then sealed it with a grey chiffon ribbon and wax stamp. Instead of including an RSVP card and return envelope, I included a small card that directed the guest to my wedding website where that person could RSVP for themselves and any applicable party members. This cut down having to buy the RSVP card return envelopes and associated postage. And by listing all details of the wedding including directions, event day schedule and registry/cash fund details on the site - I didn’t have to produce those cards and include in the suite.
Wax Seal Stamp
The last touch to complete the suite was the custom wax seal that I had made. On the actual invites, I did a mix of silver and deep bronze/gold wax. I really like pairing golds and greys/silvers together, so this was how I incorporated the darker gold tones. It’s really easy to customize your own wax seal, it’s just typically made in China so you have to account for the production and ship time - Amazon has an amazing selection here. Although using a wax stamp has an old world nostalgia associated with it, the beauty of using a wax stamp is it really elevates the look of your mail piece & invite, it makes it more exciting for your guests to receive and open, and there are a variety of designs, fonts and colors that you can use to fit your aesthetic and wedding theme.
Mailing Wedding Invites - Postage & Hand Cancelling
How do you properly mail a wedding invite you may ask? Well, I had weighed the complete invite and placed partial postage, because due to the irregular shape for the wax seal on the outside of the envelope, I did not want to chance having the envelope run through USPS’ machine and getting jacked up. That’s why, if I didn’t hand deliver invites (this saved immensely on postage, I made sure to bring invites with me when I knew I was going to being seeing one of my guests), I brought the remaining partially stamped invites to the post office when it was not busy and asked the clerk if she could attach the remaining postage needed and if I could hand cancel each envelope so that they are not run through the machine. Hand cancelling means you postmark stamp on top of the envelope’s postage by hand which indicates that the stamp can no longer be used - it is cancelled. This is in comparison to the envelope being automatically postmarked when run through the post office’s machine. Unless you absolutely have to use a specific style stamp, it is best to bring in your invites un-stamped, have the clerk weigh the envelope and help you add the correct amount of postage. Just be sure to head to the post office when it’s not busy - I stopped into my local office when they first opened in the morning on a weekday. Each envelope ended up being 85 cents in postage (we used a two ounce stamp = 70 cents and an Additional Ounce Stamp = 15 cents), the reason why I hadn’t used a forever stamp + additional postage is because I had purchased two ounce celebration stamps an already affixed 1 stamp to each envelope, so the clerk had to add on the remaining postage. Be sure to check with your local post office if they offer hand cancelling, and if you don’t need hand cancelling but want to be able to affix your own stamps (such as a custom stamp), you can weigh your mail piece at one of the post office kiosks or take it to the clerk to weigh it and tell you how much it would cost in postage.
If you’re currently planning your wedding invites, what kinda of styles or designs are you leaning towards?